Monday, July 23, 2012

Long time, no blog!

Moved into our new house and are trying to finish getting settled in.  This took awhile because we were moving from a travel trailer into a big mobile home on our land.  So we had to move in with family, get our old house cleared out and moved out of the way and get the new site inspected and totally ready for the new house.  Then hook up the electricity, water, and sewage, and move in.  Right after we got into the new house my hubby had a heart attack (he's absolutely fine and back to work, he just frightened me a bit) and I pinched my sciatic nerve somehow and have been out of commission most of the summer.  Finally I'm back and will have loads to  post. 
I went to price bathroom rugs and curtains and such and I know I need drapes before I would ever get them sewn, so I'm going to buy the drapes, BUT, have you seen the prices of bathroom rugs?!?  Fortunately, I have a plan.  Which will lead to my next tutorial.  Area rugs (not necessarily bathroom, I plan for them for the laundry room, kitchen, and both bathrooms) that are completely recycled.  So, while I am making the tutorial, let me just give you a heads up so you can be collecting the necessities.

1) Old jeans.  It doesn't matter what color or size, or if they have stains or holes.  Wash them, if needed, get your seam ripper out and rip the seams or, if you prefer, cut the seams.  Press them flat and fold them neatly.  Bigger means a little less work, but size doesn't really matter. 

2) Old T-shirts.  Again, size and condition do not matter.   Wash if necessary, cut the seams and fold neatly.  I harried nicely asked family and friends for their old shirts too.  You really will  need quite a few.  Go with at least 12-15. 

You will also need:  A sewing machine, dark pen or marker, (not a disappearing one) scissors, a ruler (or a rotary cutter, mat and ruler), and at least 2 fresh spools of thread.  Color choice doesn't matter, it won't show. 

See you soon :)

 Robbie

Monday, January 16, 2012

TWIRL!

Twirl by Me & My Sister Designs is my favorite new fabric.  I absolutely love the colors of it and I want something made from it!  You can see all the fabrics for Twirl here.  I have some on order that will arrive tomorrow and I can't wait to get my hands on it!  
Anyway, I just found a layer cake giveaway for it on Sew bitter sweet designs and had to share!
Here is the link and good luck to you!  Twirl Giveaway

Wednesday, December 21, 2011

A visit to a quilt shop

I have been really sick with a sinus/ear and throat infection and have been miserable.   A week on antibiotics, but I've pulled a muscle in my back coughing.  This has not been a fun week.  It will definitely be another week or so for recovery and planning my next project.
BUT! I had a nice visit to a quilt shop today while I was on the coast for an appointment.  There aren't many quilt shops on the coast and none in my area at all.  Janet's Quilting Bee, Inc. was closed when my son and I pulled up and we had 30 minutes before time for them to open.  Since Little K had a new book and I had my Nook we weren't likely to be bored, so we settled in to wait, but when she came in a couple minutes later she let us in to look!  
  I could have happily spent the whole day in there and pestered the daylights out of her....but I didn't.  I did buy a few fat quarters and a scrap bag.  The scrap bag I have cut up and got as many charms squares as I could out of it because my (AWESOME!) Mother-in-Law would like me to help her make a raggy quilt over Christmas break.  The rest of the scraps I have saved in my bucket for anything and everything  I can think of to do in the future.  
One of the fat quarters I purchased was a Florida Gators print for my hubby.  He's a fan and I want to surprise him with something (maybe a mug rug for his office?) in the near future.
The others were vegetable prints.  I know that the Jar Quilt fad is gone by several years, but I collected pieces for jar squares about 2 years ago and I *so* want to make one.  That may be my next tutorial.  I can't be the only beginner who finds jar quilts lovely and charming.  So if you missed the jar quilt fad a few years ago, stick with me,  I'm bound to do one sometime in the near future.  After all, if I want to make the quilt anyway, I might as well document the process.  You may want to consider finding some fruit and veggie prints. Unless you are like me and were already obsessively squirreling them away.
In other news- I received a couple of emails last week letting me know that I won 2 of the prizes from the Quilter's Gallery Blog Hop Party.  One is for the latest Quiltmaker 100 Blocks issue (I definitely needed this since I have no patterns!) and the other is for a Senai Oz for Moda jelly roll.  I am so looking forward to getting these in the mail.  I played with charm squares in November, and December...I guess January may have to be for playing with jelly rolls!   Maybe a Valentine's quilt.....
Anyhoo, I hope you all have a very Merry Christmas and a Happy New Year.  


RobbieJoy

Thursday, December 15, 2011

My Raggy Quilt tutorial

I know it took awhile, but it's finally finished!  I've been so sick the past couple weeks and especially today that it has been slow going.  Not to mention I have been participating in a huge Quilter's Blog Hop instead of clipping seams.  And I have a work space that is roughly the size of a TV tray. 
I am so excited about the quilt being finished that I can't sleep so I decided to post instead.  
I hope you read the last post and have your supplies already, I am so sorry that it took me so long, but the waiting is over!
The charm packs I chose were Moda Winter Wonderland.  I used 15 charm packs total.  I have enough left over for a fantastic tree skirt that I want to make.  It will match but not be raggy.  
 These are the fabric numbers.


If you purchased the charm packs you have no need to cut your fabrics since they are pre-cut.  
You will, however, have to cut your Warm and Natural or Warm and White if you prefer.  
I said that I prefer the Warm and Natural in my last post, but I didn't say why.  I prefer it because you don't have to quilt very close, (you can leave up to 9'' between your stitches) and also because I have seen a picture of a quilt dried in the clothes dryer that has scorched because of using the 'cheaper' so-called natural batting.  It is needle punched and won't pill or bunch.  (Nope, they aren't paying me to plug their product!)


You will need to cut your batting into 4'' squares.  You can use a rotary cutter, or just mark the lines with your ruler and a marker and cut a couple layers at a time with scissors.  My cutter was a little dull the last time I used it and I just went the 'cheating' route and marked about 40 squares at a time.

 I inherited this awesome ruler from my mother who has had it as long as I can remember.
That is why so many of the lines are worn in places, but it's a link and I wouldn't trade it. :)
After I cut my batting out, I set it and the charm squares in a convenient way on my table so that 
I could do them assembly-line style.  I think the next few pictures are pretty self-explanatory.
 First layer goes down upside down.  
 I set my charm square packs out 2 at a time so I can have both 
front and back fabric the same on each square.
  Center your 4'' batting square on top and place next square on top of it.

I pin at mid section and corner and just stack them until I have 
them all ready to chain sew.
 Stitch from one corner across the square to the next and I fed the corner WITHOUT 
the pin in first.  I tried it pin first a couple times and this worked better.
 Picture from the back of my machine.  That's my walking foot which I found to 
be easier on me when doing this.
 Stack of squares with the first line on from corner to corner.

 Fully prepared stack below after 2nd corner to corner.


Next step is to assemble your strips you will use a 1/2 inch seam allowance instead of the 1/4 inch that is normally used for quilting.  I got the strips ready to stitch by pinning them together in a somewhat random, but not repeating order.  You could choose to make them patterned somehow, but the randomness called to me.

And here are my strips.  Make sure that you back stitch a few stitches at
the beginning and the end of each pair of squares so you don't have to tie a million knots.
At the beginning and end of each row as you add to your quilt you want to
also make sure that you take several backstitches.
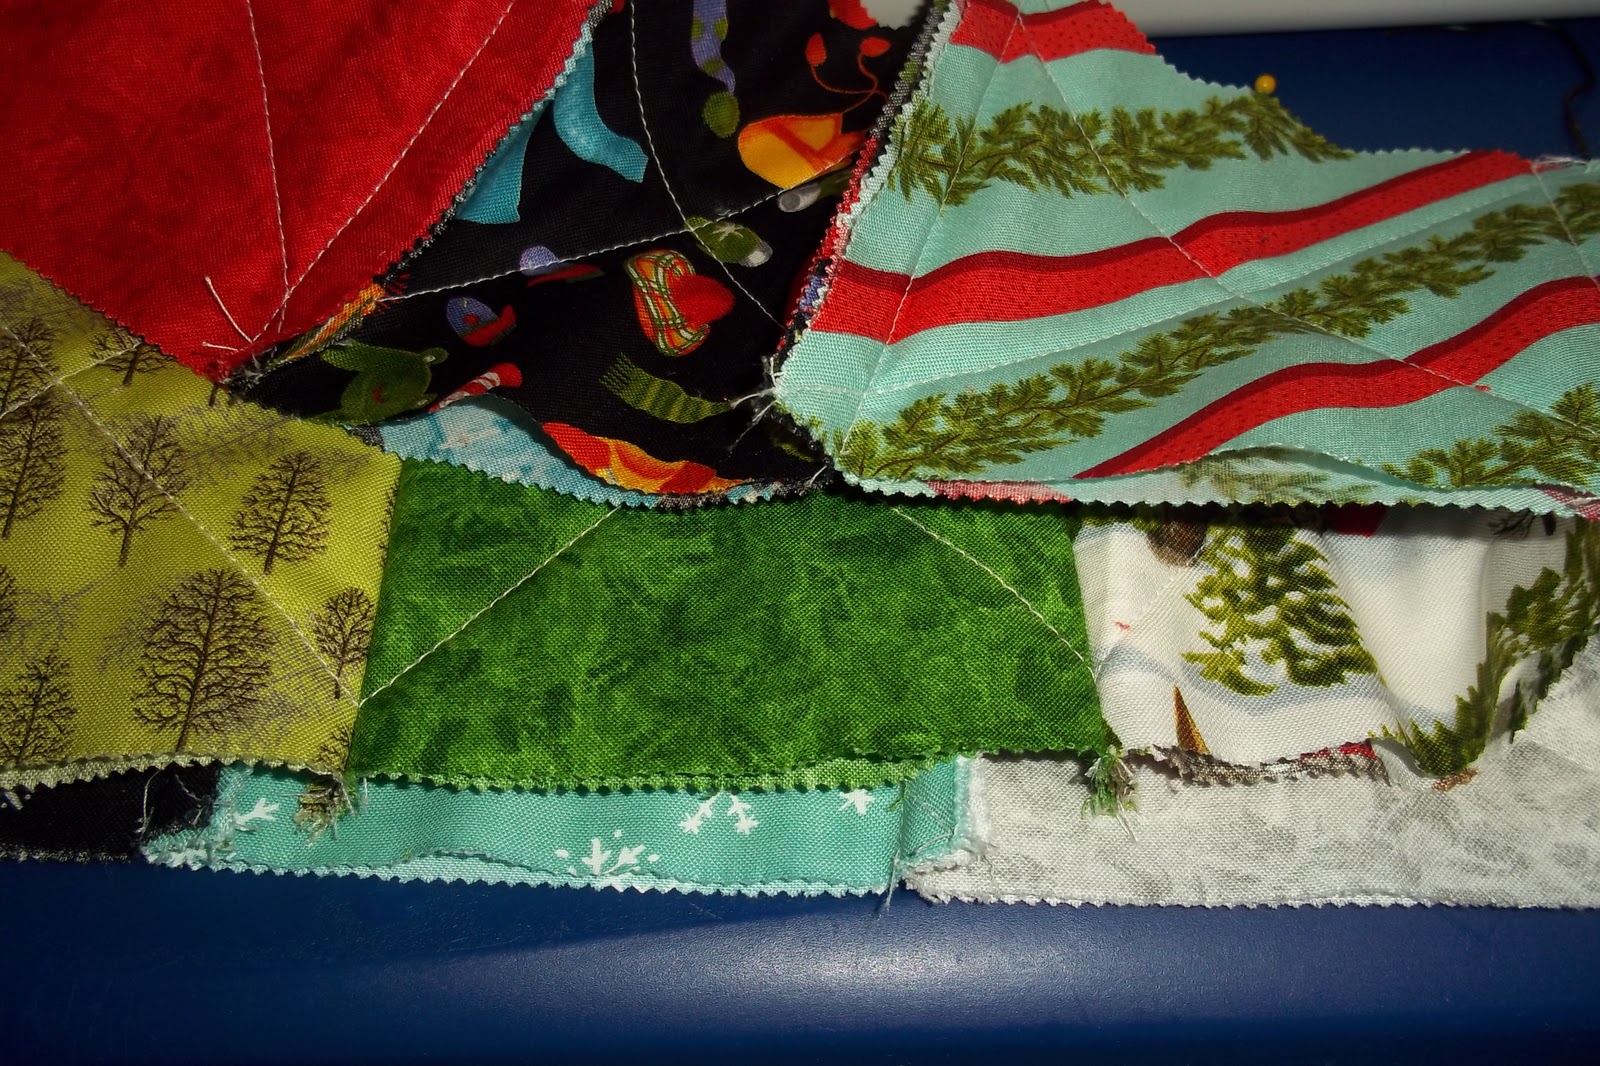
 And be sure to stitch with your seams OPEN instead of turned either way.

Last row to add and getting ready to clip! 

Clip your stitches at least an 1/8 of an inch from your seams.  
You absolutely do not want to chance clipping your stitches. 
Nearly finished.

 Finished and washed.  It ravels so nicely and I just love how warm and soft it is.
I'm not sure why that snowflake square looks like that, it's the flash, I suppose.
It's a good thing I'm not calling this a photography blog.  lol
 A larger picture.  This is a quarter section of my finished quilt.
Here is a picture of the back of it.  It's all smooth because the seams are on the front.


Sunday, December 4, 2011

The Raggy Quilt

The first project I am going to post a how-to for is a raggy quilt.  I am currently working on one and taking pictures to post as I go.  I used charm squares for mine because I have an area that is roughly the size of a T.V. tray to work on in my (tiny!) house.  No batting is needed if you are using flannel fabric, but if you are not, I suggest Warm & Natural.  To start small, a good sized baby blanket will be 10 x 12 squares.

10 X 12 = 120 squares.

BUT  you have to double that number because this is a quilt-as-you-go and you need a front and a back.
So you need 240 of the 5'' squares.

I was able to get 15 squares out of a fat quarter.

240 divided by 15 = 16.  So you need 16 fat quarters or 8 half-yards depending on how much variety you want in your quilt.  If you sew already you may have a stash you can raid.

Now, if you are *not* using flannel you will need to cut 1 - 4'' square of batting for each quilt square. So 120 of the 4'' squares.  I can get 90 squares out of a yard of batting, so I would need not quite 1 1/2 yards of batting.

Each square will finish at 4'' because we use a 1/2'' seam allowance.

I also used a walking foot on my machine.  It helped immensely.  If you don't  have one, or don't want to use it, you may need to use more pins than I did.

The Un-blog

This is not really meant to be a blog, just a tutorial or two for a couple awesome long-distance friends to use.  If you have found it and you find it helpful for you, awesome!  If you have tips to post that you feel would make something easier, time-saving, or less stressful, please share.  Thanks for reading my non-blog.